Documentation
Helpbook Builder User Guide
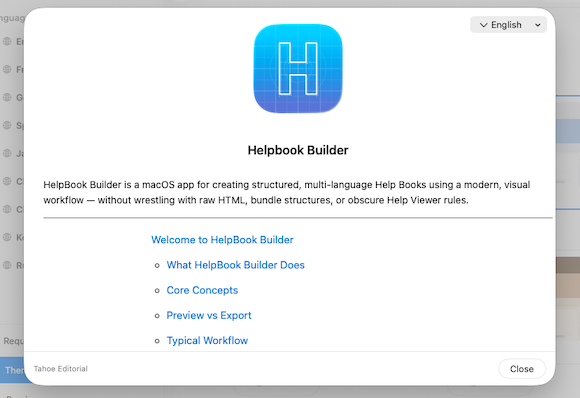
HelpBook Builder is a macOS app for creating structured, multi-language Help Books using a modern, visual workflow — without wrestling with raw HTML, bundle structures, or obscure Help Viewer rules.
What Is a macOS Help Book?
A Help Book is a special .help bundle that macOS loads inside the Help Viewer. It contains:
- Structured HTML pages
- A language-aware bundle layout
- An
Info.plistwith required metadata - Proper resource paths and access points
- Localized
.lprojdirectories
HelpBook Builder generates all of this automatically.
What HelpBook Builder Does
HelpBook Builder lets you:
- Create structured help content using a sidebar-driven page hierarchy
- Build parent/child page relationships
- Control which pages appear in the Table of Contents
- Author rich content using RTFD (attachments included)
- Add a Help Book icon and banner
- Manage multiple languages
- Preview the rendered HTML live
- Export a valid
.helpbundle ready for Xcode
No manual bundle editing.
No hand-written HTML required.
Core Concepts
Pages

Pages are the foundation of your Help Book.
- Top-level pages become standalone HTML files.
- Child pages render as nested sections within their parent.
- Each page has a stable internal identifier.
- You control page ordering and TOC visibility.
Languages

HelpBook Builder supports multiple languages.
- Each language renders to its own directory.
- The development region controls the default entry point.
- The language bar is automatically generated.
- Exported bundles use proper
.lprojstructure.
Assets
You can provide:
- App icon (256×256)
- Banner image (wide format)
These are embedded into your Help Book bundle and exported into the correct Resources/img directory.
Preview vs Export
HelpBook Builder separates preview rendering from final export:
Preview Mode
Renders your Help Book into a temporary directory for live viewing.
Export Mode
Produces a production-ready .help bundle with:

Contents/Info.plistResources/<language>.lproj- Shared CSS
- Image assets
- Install guide
The preview uses the same renderer pipeline as export — what you see is what you ship.
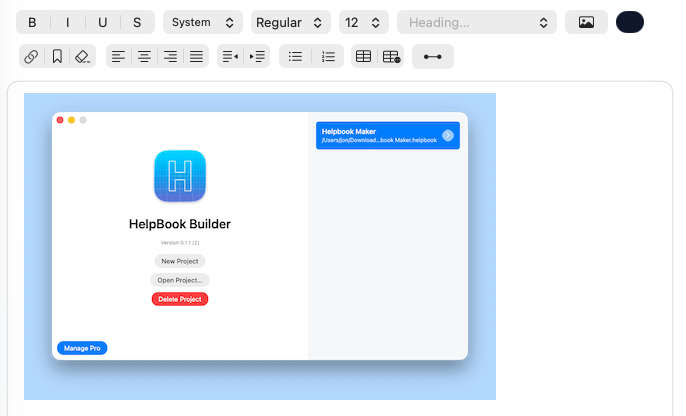
New Project
Open the Organizer and choose New Project. Helpbook Builder uses a document-based file system, so each project is saved as a local .helpbook package on disk using the macOS save panel.
When you create a new project, the app writes a structured package with Contents/Project.json, Contents/Pages, and Contents/Assets. This keeps project metadata, page content, and media in a predictable local folder layout that can be versioned and backed up.
- Open the Organizer window.
- Click New Project.
- Choose where to save the
.helpbookfile. - Confirm to create and open the project editor window.
Open Project
Use Open Project in Organizer to load an existing .helpbook package. The file picker is restricted to the Helpbook document type so only valid project files are selectable.
The Organizer also displays your recent projects from the macOS recent documents list. You can open a recent entry by double-clicking a row or using the row action button on the right.
- Open Organizer.
- Click Open Project and pick a
.helpbookfile, or choose a project from Recents. - The project opens in the editor and Organizer closes automatically.
Delete Project
Select a project in the Organizer recents list, then use Delete Project. The app shows a destructive confirmation dialog before removing the selected project from disk.
Deletion uses the local file system directly and permanently removes the selected .helpbook package at its file path. If you need recovery options, keep backups or version control copies of your projects.
- Select a project in the recent list.
- Click Delete Project.
- Confirm the delete action in the prompt.
Add a page
Use the page controls in the project sidebar to create a new top-level page. Top-level pages become standalone HTML files in your exported Help Book.
- Open your project in the editor.
- In the page tree, add a new page at the root level.
- Enter the page title and begin writing content in the editor.
Delete a page
Delete removes the selected page from your project tree and exported output. Use this when cleaning up draft or deprecated content.
- Select the page in the sidebar tree.
- Use the delete control for that page row.
- Confirm the delete action in the prompt.
Add a page section
Page sections are child pages nested under a parent. This is useful when a main topic needs smaller, scoped subtopics.

- Select the parent page in the tree.
- Add a child page under that parent.
- Reorder child pages to control how sections appear in navigation.
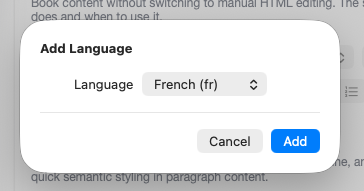
Add a language
Click the language + control in the sidebar header to open the Add Language sheet. The picker shows only supported languages that are not already in the project, so duplicate language entries are prevented automatically.
When you select a language and confirm Add, the app creates a new language entry with a default Introduction page, appends it to the project, and updates sidebar selection to that language.
The document file system is updated at the same time: HelpBook Builder creates a language folder in Contents/Pages/<languageID> and creates a blank .rtfd page container for the starter page so editing can begin immediately.
Language limits are enforced in this flow. On the free plan, language count is capped at three; when the cap is reached, add-language actions are disabled and upgrade messaging is shown.
Import Pages
Use the language AI workflow to import pages from one language into another language. The import flow lets you choose a source language and import all pages or a selected subset.
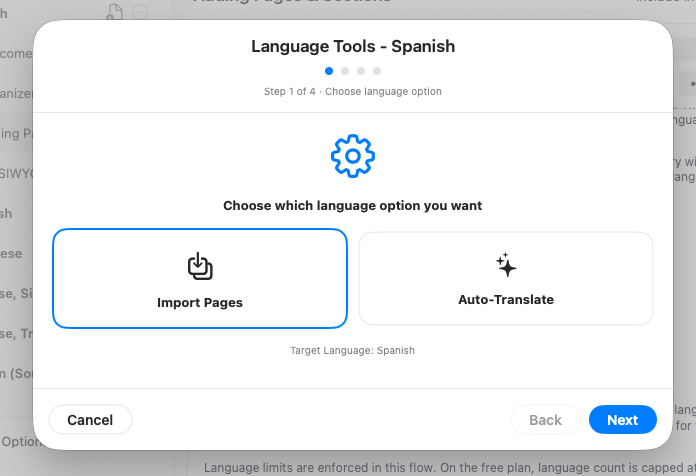
When importing, HelpBook Builder clones page structures into the target language with new page IDs so tree integrity is preserved. If you import all pages, the target language page set is replaced; if you import selected pages, cloned pages are appended to the existing target set.
The app then synchronizes the filesystem in Contents/Pages by copying each source page .rtfd container into the target language folder using the new ID mapping. If a source page file is missing, a blank page container is created so project state stays consistent.
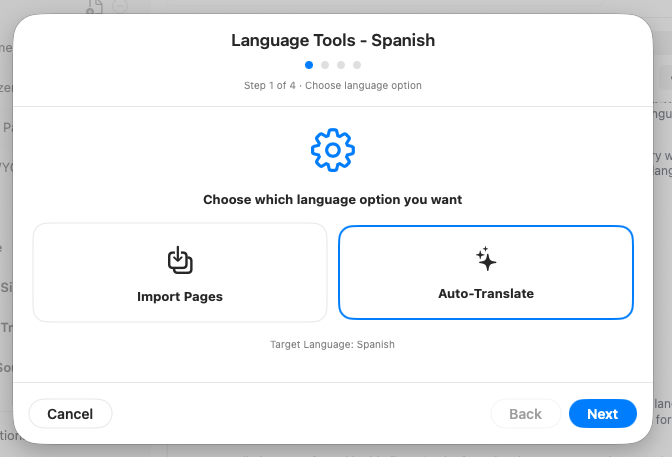
Auto-Translate
Auto-Translate runs from the same language wizard and translates content into the selected target language using a configured model provider. You can translate all pages in the target language or only selected pages.
In the current implementation, translation updates both page titles and page body content. For each selected page, the app translates the title, loads the page RTFD content, translates attributed text while preserving formatting, and writes the translated result back to the page container.
Auto-Translate requires Pro access. If Pro is not active, translation is blocked. Import Pages remains available independently of translation so language structures can still be prepared before translation runs.
Add a title
Each page should have a clear, human-readable title. Titles are used in navigation, preview output, and exported documentation structure.

- Select the page you want to edit.
- Set or update the page title in the page metadata area.
- Verify the title in live preview to confirm hierarchy and readability.
Using the TOC toggle
The TOC toggle controls whether a page appears in the generated Table of Contents. Keep utility pages hidden and user-facing pages enabled for a cleaner Help Viewer experience.

- Select a page in the sidebar.
- Enable or disable the TOC visibility option for that page.
- Use preview to validate the final navigation before export.
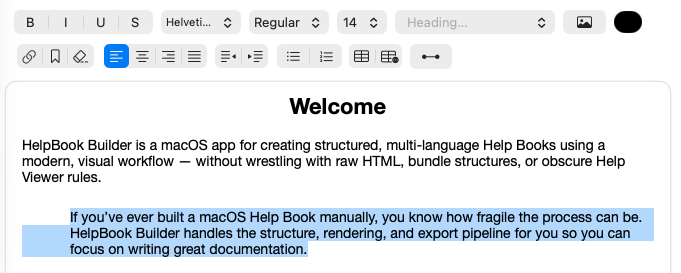
WYSIWYG Editor
The WYSIWYG editor is organized into focused tool groups so you can author, format, and structure Help Book content without switching to manual HTML editing. The sections below describe what each group does and when to use it.

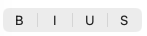
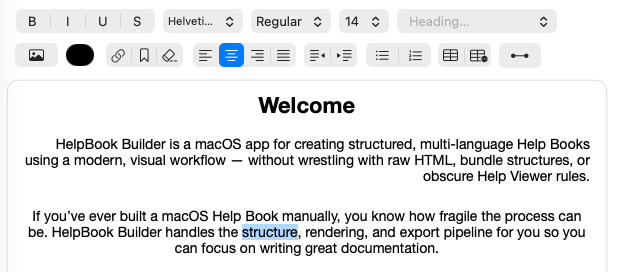
Text Formatting
The Text Formatting section includes Bold, Italic, Underline, and Strikethrough for inline emphasis and quick semantic styling in paragraph content.
Bold
Use Bold to emphasize key terms, feature names, and short action labels users should notice first.
Italic
Use Italic for lighter emphasis, contextual notes, and references that should stand out without dominating the line.
Underline
Use Underline sparingly for instructional emphasis where visual reinforcement is useful in step-by-step guidance.
Strikethrough
Use Strikethrough to indicate deprecated options, old steps, or replaced terminology while preserving historical context.
Font Management
The Font Management group controls type family, face variants, size, color, and heading presets directly from the editor toolbar. These controls apply to selected text or to the current typing state when no text is selected.

Font Family Dropdown
Use the family dropdown to switch between System and available font families. In the editor logic, this maps to applying a new base family while preserving the current point size.
Font Face And Weight
Use face/style controls to apply variants such as Regular, Medium, Semibold, or Bold when available for the selected family. Bold and Italic toggles are trait-based and can be applied to a selection or carried forward to new typing.
Font Size
Use the size dropdown to scale text up or down for readability and hierarchy. Size changes are applied to selected text ranges, or to typing attributes if the caret is active without a selection.
Color
The color well applies foreground color to selected text, or sets the active typing color for new text. This is useful for visual emphasis in callouts, labels, and documentation annotations.
Headings
The heading picker applies predefined text styles (Paragraph, H1, H2, H3, H4). In the current implementation, heading levels map to preset point sizes and font weights to keep hierarchy consistent throughout the document.
Image
The editor supports two insertion paths for images: toolbar-based file selection and direct drag-and-drop into the text view.

Insert From Toolbar
Click the Image button in the toolbar to open the file picker. The picker is limited to image file types, and selected files are inserted at the current caret position (or replace the current selection).
Insert By Drag And Drop
You can also drag an image file directly into the editor body. The text view accepts file URL drops and imports graphics inline as rich-text attachments.
How Placement Works
Inserted images behave like inline content in the document flow. Positioning is controlled by where you insert the image and by paragraph alignment controls (Left, Center, Right, Justify) in the editor toolbar.
How Sizing Works
On insert, very large images are automatically scaled down to a max display width of 400 points to keep layouts readable. The original image data is stored as an attachment in the page’s RTFD content for persistence and export.
Links
The Links group supports external URLs, internal page links, and anchor-based navigation. The editor tracks link metadata so links remain identifiable in both editing and rendered output.

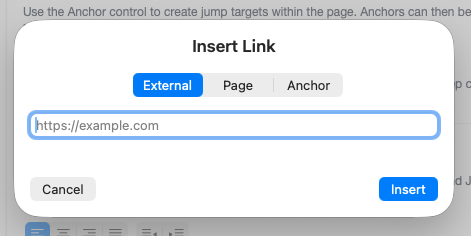
Insert Link
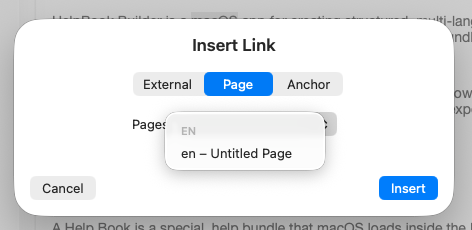
Use the Link control to add or edit linked text. The editor supports different link kinds (external, internal page, anchor, and anchor link), which are stored as structured attributes in the document.
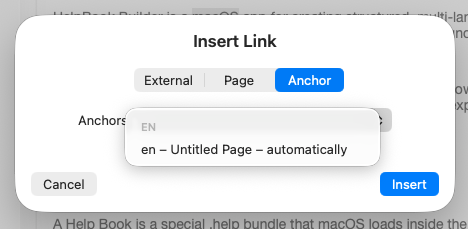
Insert Anchor
Use the Anchor control to create jump targets within the page. Anchors can then be referenced by anchor links for in-page navigation and long-form documentation workflows.
Link State And Editing
The toolbar reads current caret/selection attributes to detect active links and keep controls in sync, so updating or removing links is predictable while editing.
Alignment
Alignment controls apply paragraph-level formatting using Left, Center, Right, and Justify modes. These settings are applied to selected ranges, or to the current paragraph when no text is selected.

Paragraph Behavior
Alignment updates paragraph style attributes directly, which keeps the layout stable across save/load cycles in the RTFD-backed editor.
Indentation
Indent and outdent actions adjust paragraph indents in consistent increments, and apply to selected ranges or active typing context while respecting list and table constraints.
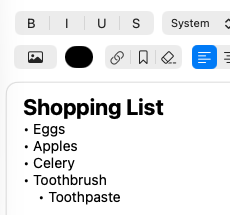
Lists
The Lists section supports bulleted and numbered lists with nested structure. Use numbered lists for ordered procedures and bullets for grouped reference content.

Nested Levels
List nesting is handled through keyboard behavior: Tab increases nesting depth and Shift+Tab outdents, allowing sub-number and sub-bullet hierarchies.

Editing Behavior
Return and delete behavior is list-aware, so editing inside list items preserves list structure while still allowing clean exits from list mode when needed.
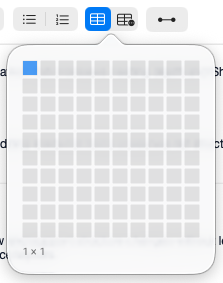
Tables
Tables are fully editable in the WYSIWYG flow and support structure changes without leaving the editor. This is useful for option matrices, comparisons, and technical reference layouts.

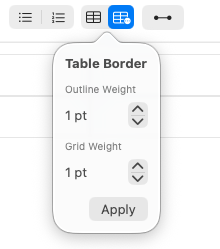
Table Creation
Insert a table with configurable row/column dimensions, then apply border settings using table border controls.
Row And Column Operations
You can add rows/columns, insert rows above/below, and insert columns left/right. Table-specific context actions also support deletion and structural updates.
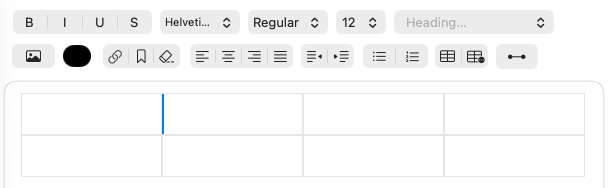
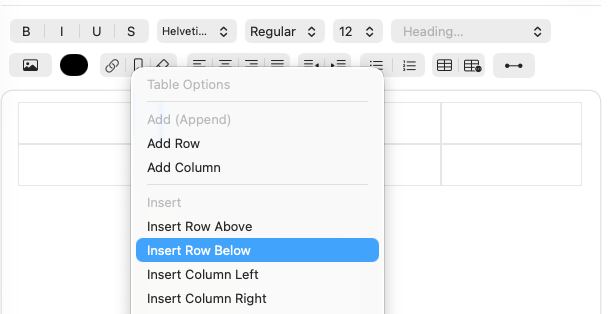
Table Interaction Rules
The editor enforces table-aware selection and command behavior so destructive actions apply to table structures safely and consistently.
Horizontal Rule
Horizontal Rule inserts a visual divider attachment that separates major content blocks. The editor inserts the rule plus a trailing newline so you can continue typing cleanly below it.

Persistence Model
The rule is stored as a specialized attachment marker in the RTFD content and rehydrated on load, so the divider remains stable across save/export cycles.
Required Options
The Required Options panel is where HelpBook Builder stores metadata and assets used by preview and export. These values are bound directly to the project model and written into generated bundle output.
Helpbook Identity
This section defines core identity fields: bundle identifier, book title, and development region. The development region picker is populated from currently configured project languages, and the selected value is validated against available language codes.

If the current development region is no longer valid, the UI falls back to the first available region (or en) so export state remains consistent.
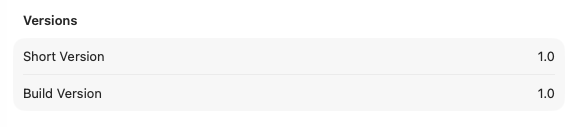
Versions
Versions includes short version and build version fields. These values map to project version metadata and are used during export when generating production bundle metadata.
Knowledgebase
Knowledgebase includes three fields: KB Product, KB URL, and KB Description. In the exported Help Book manifest (Contents/Info.plist), these map as follows:
- KB Product → written to
KBProductinInfo.plist - KB URL → written to
KBURLinInfo.plist - KB Description → used in rendered Help Book header content (including localized overrides)
In Apple Help workflows, KBProduct and KBURL act as knowledgebase metadata for the bundle. When your .help bundle is embedded in an app and registered through the app’s Help Book keys, these values provide product context and a canonical support endpoint tied to that Help Book.
KBProduct identifies the product name associated with the help content, which helps keep the bundle’s metadata aligned with the app identity. KBURL defines the product’s support/knowledgebase URL so integrations or fallback help flows have a stable destination outside the local bundle.
Practically, keep both values stable across releases: changing them frequently can fragment metadata continuity between app builds and published help resources.
Localized Headers
Localized Headers are generated per language in the project. For each language, you can override localized title/header text and localized description values.
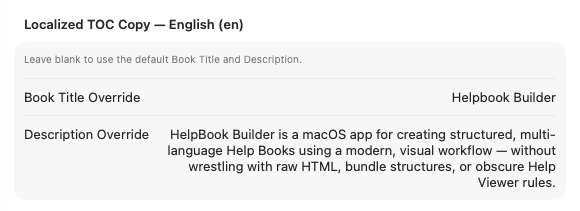
Overrides are stored by language code, and empty values are automatically removed from the override dictionaries to keep project state clean.
Assets
The Assets section manages icon and banner files with strict validation before saving to disk. Icon uploads must be exactly 256×256, and banner width must be between 600 and 3000 pixels.
Accepted assets are written to Contents/Assets/icon.png and Contents/Assets/banner.png. The panel also supports loading existing assets from disk on open, and remove actions clear both disk files and in-memory project data.
Export Guide
When you export, HelpBook Builder generates a .help bundle intended for macOS Help Viewer integration. Use this section as a practical install/reference flow after export.
Bundle Layout
Typical exported structure:
Your Helpbook.help/
└─ Contents/
   ├─ Info.plist
   └─ Resources/
      ├─ en.lproj/
      │   ├─ index.html
      │   └─ <top-level pages>.html
      ├─ Shared.css
      └─ img/
          ├─ icon.png
          └─ banner.png
Top-level pages are exported as individual HTML files. Child pages are rendered as nested sections in parent page output.
Required IDs
Keep your help book identifiers consistent between exported bundle metadata and app target configuration.
HPDBookIdentifier = acme.com.HelpbookIf these values drift across app/build/export, Help Viewer may open the wrong book or fail to resolve your bundle.
Embed In Xcode
Add the exported help bundle to your app as a folder reference, then verify Info.plist app keys match your exported bundle metadata.
- Drag
Your Helpbook.helpinto Xcode. - Choose Create folder references (blue folder), not groups (yellow).
- Confirm it appears in Build Phases → Copy Bundle Resources.
Add app Info.plist keys:
CFBundleHelpBookFolder = Your Helpbook.help
CFBundleHelpBookName   = acme.com.Helpbook
Then verify exported help bundle values:
HPDBookIdentifier = acme.com.Helpbook
HPDBookAccessPath = en.lproj/index.html
Open Help In App
Use NSHelpManager to open your help book from AppKit:
NSHelpManager.shared.openHelpAnchor("", inBook: "acme.com.Helpbook")An empty anchor opens the configured access page; later you can pass specific anchors for deep links.
Troubleshooting
Wrong help book opens: Ensure app CFBundleHelpBookName matches exported HPDBookIdentifier.
Blank/white page: Verify Resources/en.lproj/index.html exists and HPDBookAccessPath is correct.
Help content appears cached: clear Help Viewer cache and restart it.
rm -rf ~/Library/Group\ Containers/group.com.apple.helpviewer.content/Library/Caches/*
killall HelpViewer
App quarantine/xattrs issues:
xattr -cr <YourApp>.appValidation Checklist
Use this quick checklist after export and before release:
Contents/Info.plistexists in the exported help bundleResources/en.lproj/index.htmlexistsResources/Shared.cssexists.helpis added as folder reference and copied in app target build phases- App target Info.plist contains
CFBundleHelpBookFolderandCFBundleHelpBookName CFBundleHelpBookNameequals exportedHPDBookIdentifier
Troubleshooting
If Help Viewer is not showing your latest content, macOS may not have fully refreshed its Help Book registration yet. In practice, running the app from /Applications often forces a cleaner registration/update cycle than running only from a transient build location.
Try this flow: stop the app in Xcode, reveal the built app from the Products entry, copy it into /Applications, then launch it from there. This frequently refreshes Help Viewer behavior for updated bundles and HTML changes.
If behavior is still wrong after that, validate your plist and bundle paths first:
Validate plist values
Use this check when Help Viewer opens the wrong content, fails to open your book, or behaves inconsistently between source and built app outputs.
# Example only — replace APP for your environment.
APP="/path/to/YourApp.app"

echo "=== built app plist ==="
plutil -p "$APP/Contents/Info.plist" | rg 'CFBundleHelpBookFolder|CFBundleHelpBookName'

echo "=== built help plist ==="
plutil -p "$APP/Contents/Resources/Helpbook.help/Contents/Info.plist" | rg 'HPDBookIdentifier|HPDBookAccessPath'

# Expected (sanitized) output:
=== built app plist ===
  "CFBundleHelpBookFolder" => "Helpbook.help"
  "CFBundleHelpBookName" => "example.org.HelpBook.help"

=== built help plist ===
  "HPDBookAccessPath" => "en.lproj/index.html"
  "HPDBookIdentifier" => "example.org.HelpBook.help"
This validates that your app target keys (CFBundleHelpBookFolder, CFBundleHelpBookName) and your help bundle keys (HPDBookIdentifier, HPDBookAccessPath) are present and aligned in both source and built outputs.
If source help plist lookup fails but built help plist succeeds, your build artifacts may be correct while your source-path reference is wrong or outdated.
Check Registry
Use LaunchServices registry output to check whether your app/help metadata is being registered multiple times with conflicting values.
# Example only — replace identifiers for your app.
/System/Library/Frameworks/CoreServices.framework/Frameworks/LaunchServices.framework/Support/lsregister -dump \
| rg -n "example.org.HelpBook|Helpbook.help|example.org.Helpbook"
Sanitized example output (trimmed):
19294:identifier:                 example.org.HelpBook
19306:                                CFBundleHelpBookFolder = "Helpbook.help";
19307:                                CFBundleHelpBookName = "example.org.Helpbook";
19310:                                CFBundleIdentifier = "example.org.HelpBook";

20022:identifier:                 example.org.HelpBook
20034:                                CFBundleHelpBookFolder = "Helpbook.help";
20035:                                CFBundleHelpBookName = "example.org.Helpbook.help";
20038:                                CFBundleIdentifier = "example.org.HelpBook";

... (many additional repeated registrations) ...
If you see many repeated entries for the same app identifier with different help book name values, LaunchServices may be stuck re-registering old/new app copies.
To force-clear registrations, unregister each located app path:
# Example only — replace APP and identifier for your environment.
LSR="/System/Library/Frameworks/CoreServices.framework/Frameworks/LaunchServices.framework/Support/lsregister"
APP="/path/to/YourApp.app"

mdfind "kMDItemCFBundleIdentifier == 'example.org.HelpBook'" \
| while IFS= read -r p; do
  echo "unregister: $p"
  "$LSR" -u "$p"
done
After unregistering stale copies, relaunch the intended app build and re-run the registry check to confirm a clean, consistent registration set.
Manually unregister helpbooks
If stale app copies are still registered (especially from ~/.Trash), inspect each registered path and remove unwanted entries one-by-one.
# Example only — replace the bundle identifier for your app.
LSR="/System/Library/Frameworks/CoreServices.framework/Frameworks/LaunchServices.framework/Support/lsregister"

"$LSR" -dump | awk '
/^[[:space:]]*path:/ {path=$0}
/identifier:[[:space:]]+example.org.HelpBook/ {inrec=1; next}
inrec && /CFBundleHelpBookName/ {print path "\n" $0 "\n"; inrec=0}
'
Sanitized example output:
path:                       /Users/example/Library/Developer/Xcode/DerivedData/.../Build/Products/Debug/HelpBook.app
                                CFBundleHelpBookName = "example.org.Helpbook";

path:                       /Users/example/.Trash/HelpBook.app
                                CFBundleHelpBookName = "example.org.Helpbook.help";

path:                       /Users/example/.Trash/HelpBook Old.app
                                CFBundleHelpBookName = "example.org.Helpbook";
Unregister stale paths, then rerun the listing command after each removal:
"$LSR" -u "/Users/example/.Trash/HelpBook.app"
"$LSR" -u "/Users/example/.Trash/HelpBook Old.app"
Verify Help Viewer target resolution with your book ID:
open "help:bookID=example.org.HelpBook.help"If help still opens unexpected content, remove stale registrations manually until only one valid app registration remains for your current build.
Helpbook Cache
Help Viewer cache state can keep old Help Book data alive even after you fix plist values and registrations.
Check this cache location first:
~/Library/Group Containers/group.com.apple.helpviewer.content/Library/Caches/If you find cache data for your Help Book, remove it, then relaunch your app from /Applications so the book can be indexed again.
If no obvious cache entry is present, or behavior is still stale, use:
hiutil -Phiutil -P shuts down the Help process and clears cached help index state so macOS can rebuild from your current installed bundle.
After running it, give Help Viewer time to restart and re-cache. Re-indexing is not instant, so allow a short delay before re-testing updated Help Book content.
Re-Register Helpbook
Use this flow when LaunchServices has stale registrations and you want to fully reset and register only the current app build.
# Example only — replace APP and bundle identifier for your environment.
LSR="/System/Library/Frameworks/CoreServices.framework/Frameworks/LaunchServices.framework/Support/lsregister"
APP="/path/to/YourApp.app"

# 1) Unregister every installed copy with this bundle id (not just DerivedData)
mdfind "kMDItemCFBundleIdentifier == 'example.org.HelpBook'" \
| while IFS= read -r p; do
  echo "unregister: $p"
  "$LSR" -u "$p"
done

# 2) Rebuild LaunchServices DB
"$LSR" -kill -r -domain user -domain local -domain system

# 3) Register only current app
"$LSR" -f "$APP"

# 4) Verify no stale '.help' suffix records remain
"$LSR" -dump | rg -n "identifier:\s+example.org.HelpBook|CFBundleHelpBookName = \"example.org.Helpbook(\.help)?\""
This sequence unregisters all old app copies, rebuilds the LaunchServices registry, then registers only the app you intend to test.
Package-vs-File Isolation
Use this quick isolation test to distinguish bundle/registration issues from plain HTML readability issues.
APP="/path/to/YourApp.app"

open "$APP/Contents/Resources/Helpbook.help"
open "$APP/Contents/Resources/Helpbook.help/Contents/Resources/en.lproj/index.html"
If the second command works but the first fails, the issue is typically bundle registration, package parsing, or Help Book path metadata, not the HTML file itself.
Sample Working Configuration
Use these sample plist snapshots as a known-good reference when validating your own exported Help Book and app target setup.
Sample Helpbook plist (bundle)
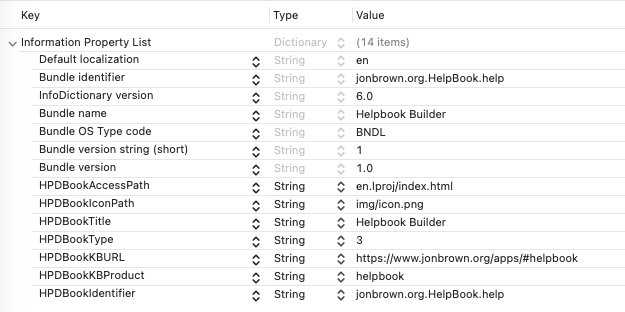
# Sample parsed values from Helpbook.help/Contents/Info.plist
CFBundleDevelopmentRegion      = en
CFBundleIdentifier             = example.org.HelpBook.help
CFBundleInfoDictionaryVersion  = 6.0
CFBundleName                   = Helpbook Builder
CFBundlePackageType            = BNDL
CFBundleShortVersionString     = 1
CFBundleVersion                = 1.0
HPDBookAccessPath              = en.lproj/index.html
HPDBookIconPath                = img/icon.png
HPDBookTitle                   = Helpbook Builder
HPDBookType                    = 3
HPDBookKBURL                   = https://www.example.org/apps/#helpbook
HPDBookKBProduct               = helpbook
HPDBookIdentifier              = example.org.HelpBook.help
Core checks: HPDBookIdentifier must match the app’s Help Book identifier, and HPDBookAccessPath must point to a real localized entry page.
Sample App plist (app target)
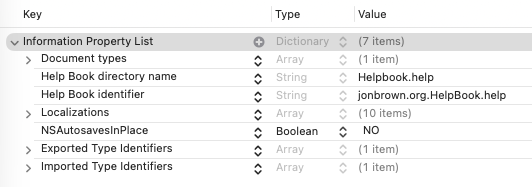
# Required app Info.plist keys (from sample)
CFBundleHelpBookFolder = Helpbook.help
CFBundleHelpBookName   = example.org.HelpBook.help
The two required app options shown in the sample are Help Book directory name (CFBundleHelpBookFolder) and Help Book identifier (CFBundleHelpBookName).
These must align with your bundle folder and HPDBookIdentifier, or Help Viewer may resolve the wrong registration.
For additional Help Book guidance and troubleshooting depth, see this reference: marioaguzman.wordpress.com — Help Book resources.